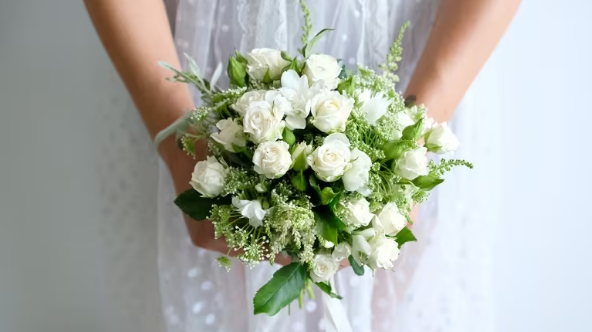
Creating a stunning wedding bouquet with artificial roses can be both a fun and rewarding experience. Whether you’re looking to save some cash or simply want a bouquet that lasts forever, this guide will walk you through the process step-by-step Silk Floral. Let’s dive in!
Why Choose Artificial Roses?
Artificial roses are a fantastic option for wedding bouquets. They’re durable, allergy-free, and can be made to match any color scheme or style. Plus, they won’t wilt or fade, ensuring your bouquet looks fresh throughout your big day and beyond.
Gather Your Materials
Before we get started, let’s make sure you’ve got everything you need. Here’s a handy list:
– Silk roses in your chosen colors
– Floral wire
– Floral tape
– A sturdy bouquet holder or a piece of foam
– Scissors
– Ribbon for wrapping
– Decorative elements (like pearls or lace)
Having everything on hand will make the process smoother and more enjoyable.
Step-by-Step Guide to Creating Your Bouquet
- Choose Your Roses
Start by selecting the Silk Floral you want. Mix different sizes and shades for a more natural look. Aim for about 10-15 roses, depending on how full you want your bouquet to be.
- Prepare the Roses
Trim the stems of your roses to about 6-8 inches long. Use scissors to cut at an angle; this helps the flowers fit better into the bouquet holder.
- Create the Base of the Bouquet
Using the floral wire, start with the largest rose as your focal point. Position it in the center and hold it steady. Add the other roses around this central flower, creating a circular shape. Don’t hesitate to play around with the arrangement until you find a look you love.
- Secure with Floral Tape
Once you’re happy with the arrangement, use floral tape to secure the stems together. Wrap the tape tightly around the stems, starting from the base of the flowers and working your way down. This will keep everything in place as you move on to the next steps.
- Add Decorative Elements
Now’s the time to get creative! Consider adding greenery, baby’s breath, or other decorative elements. You can also incorporate corsages and boutonnieres using the same style of flowers, ensuring a cohesive look for your wedding party.
- Wrap the Bouquet
Take your ribbon and start wrapping it around the stems. Begin just below the flowers and work your way down. This not only adds a beautiful touch but also helps to conceal the floral tape and wire. Secure the ribbon with a little glue or a few stitches at the end.
- Final Touches
Make any last-minute adjustments to your bouquet. Fluff the flowers, adjust the ribbon, and ensure everything looks just right. If you’re feeling adventurous, add embellishments like pearls or lace for a personal touch.
Tips for Success
– Practice Makes Perfect: If this is your first time, consider practicing a few times before the big day.
– Color Palette: Stick to a color palette that compliments your wedding theme.
– Don’t Rush: Take your time with the arrangement; it’s all about creating something you love.
Creating Corsages and Boutonnieres
For those wanting to complete the look, creating corsages and boutonnieres is simple! Use the same silk roses and follow similar steps. For a Corsage and Boutonniere. Select a smaller flower and attach it to a wristband or pin. For a boutonniere, use one to three flowers, securing them with floral tape and then attaching a pin for easy wear.
Conclusion
Making a wedding bouquet with artificial roses is a fantastic way to express your creativity while ensuring your flowers look stunning all day long. With just a few materials and a bit of practice, you can create a beautiful bouquet that reflects your personal style. Plus, you’ll have a lasting keepsake to cherish for years to come. So roll up your sleeves, gather your supplies, and let your creativity bloom!